Stan Sakai (on Facebook) wrote:
October 6, 2017
We scheduled out the deadlines for Usagi 166-172 a few days ago, and I'm already behind on turning in covers. Here is the one for UY 167.
As usual, covers are 10x15.5 inches on 11x17 inch 2-ply, 500 series, cold press Strathmore Bristol.
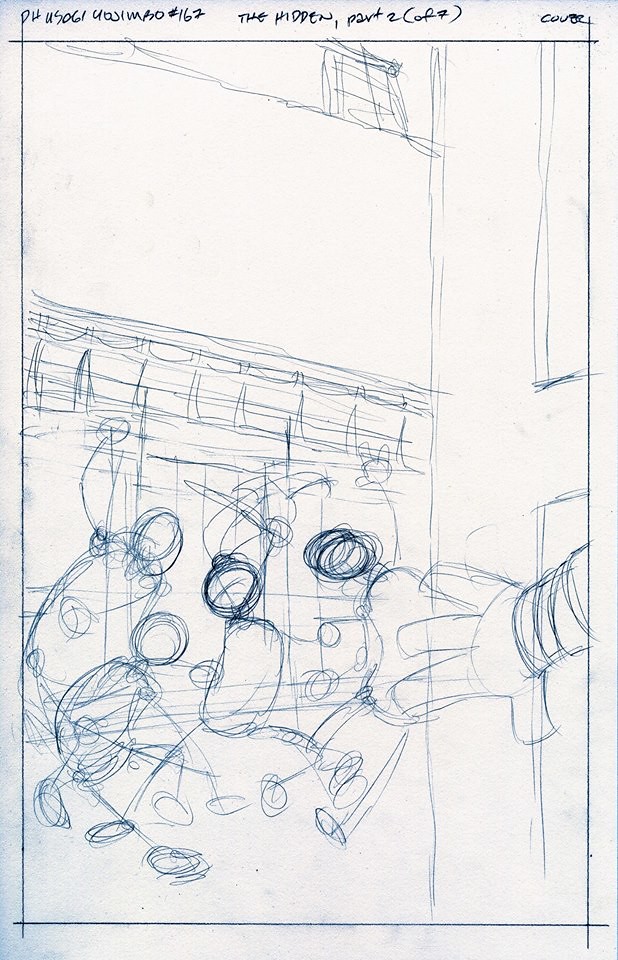
Rough pencils drawn with a .3 HB mechanical pencil. I am just dealing with shapes, staging the scene, and laying out perspectives.
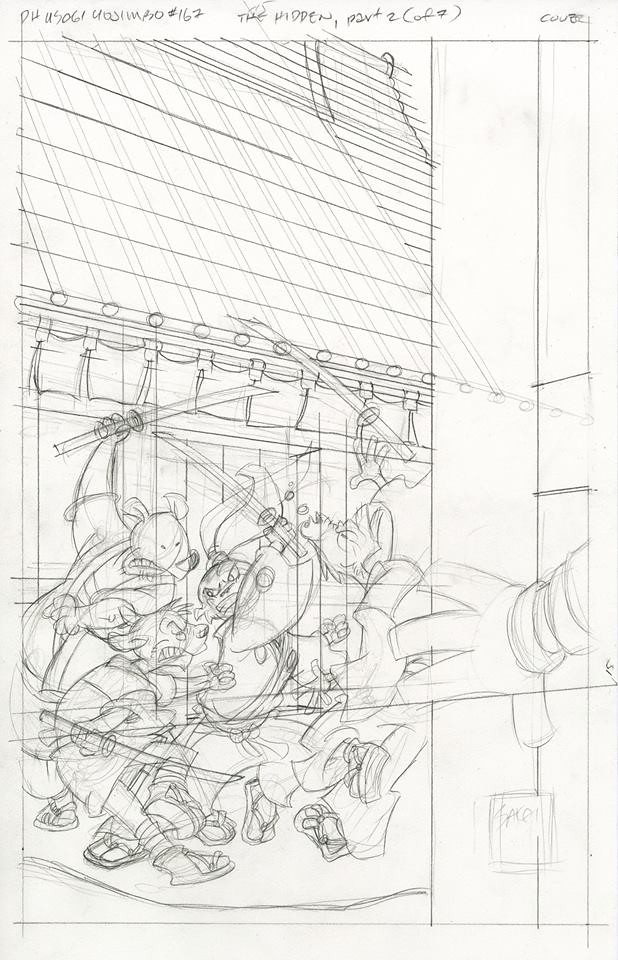
Finished pencils drawn with a .5 B mechanical pencil. I drew the basic figures and determined the background and perspectives.
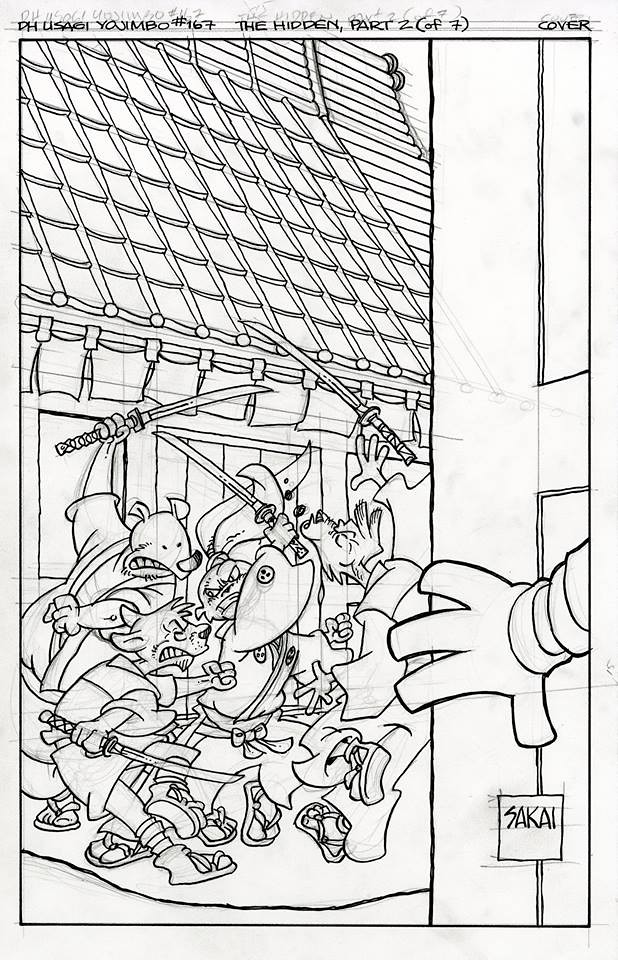
Inked but not erased.
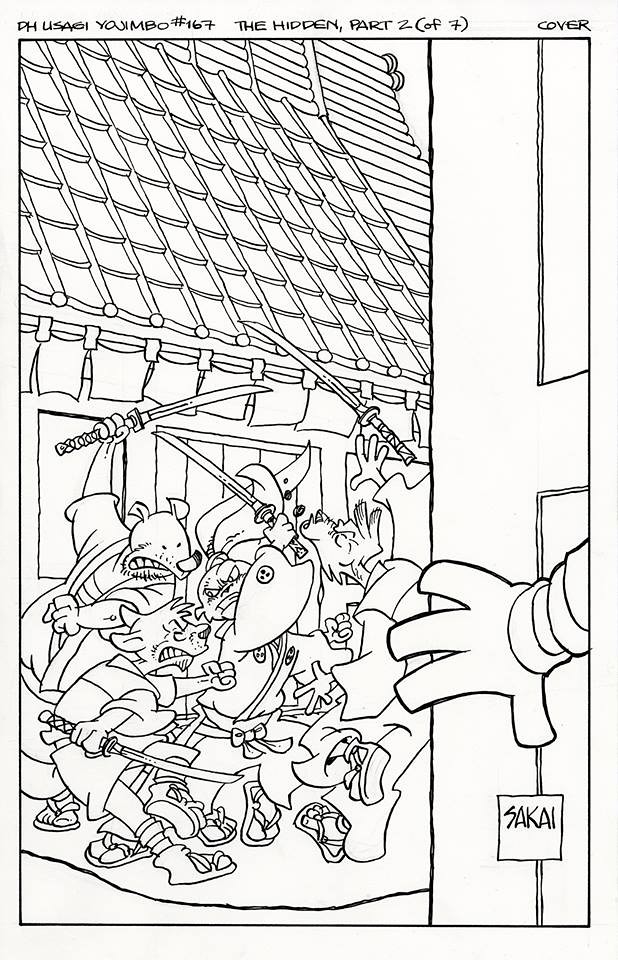
Erased inks.
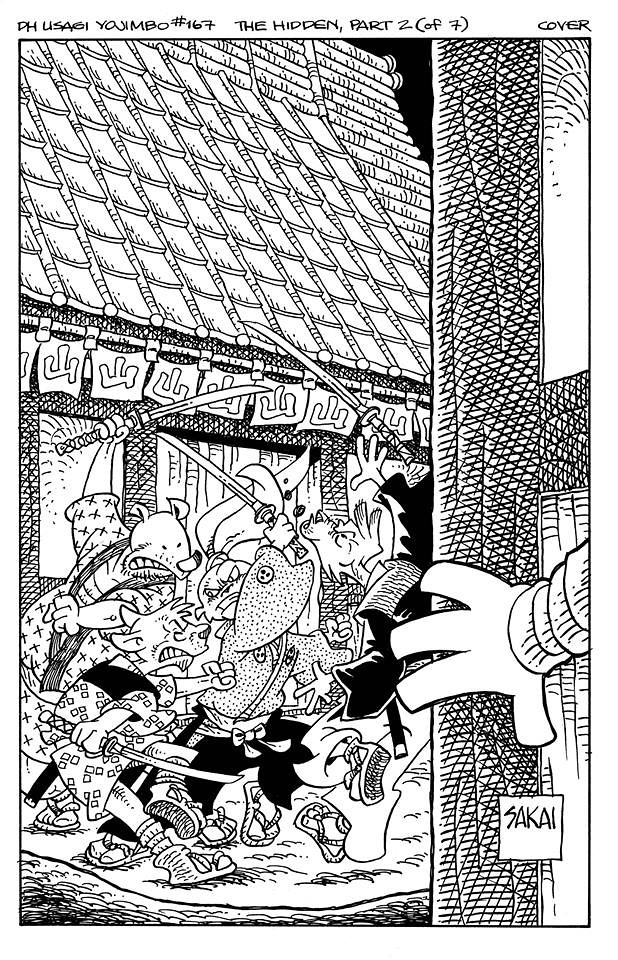
The finished piece. with textures and details inked in.
I scanned it, uploaded it onto the Dark Horse Files, and the next stage is with Tom Luth who will color it.
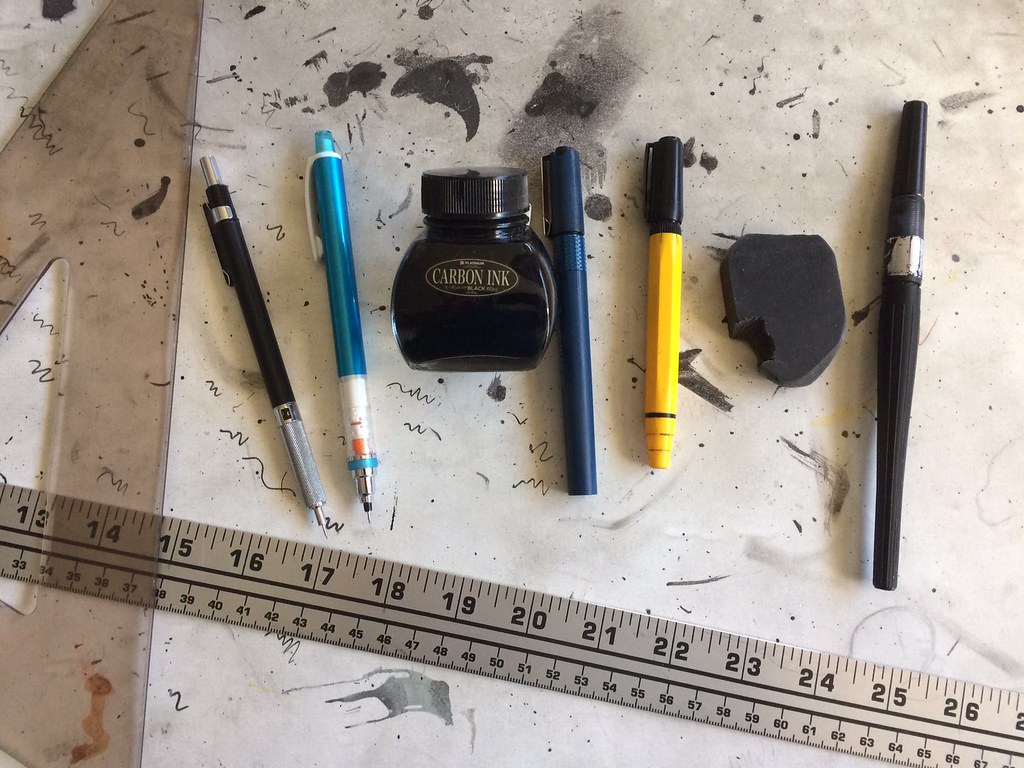
These are most of the tools I used--triangle, meter stick for perspective, .3 pencil, .5 pencil, ink, technical pen for ruling the borders, Koh-i-Noor Art Pen (discontinued), Sumo black eraser, and pen brush filled with Carbon Ink for spotting blacks.
You can't fake perspective, so I used the meter stick to pencil in the lines from the vanishing point.
The Platinum Carbon Ink is one I have been trying out to various levels of success. It is nice and free-flowing, but not as dark as I would like.
The Art Pen has a nice flex to the nib that can give wonderful variations in line weights but, unfortunately, it was discontinued many years ago.
I use the nylon tipped brush pens because I don't need to wash it out after every use. I fill it with the Carbon Ink.